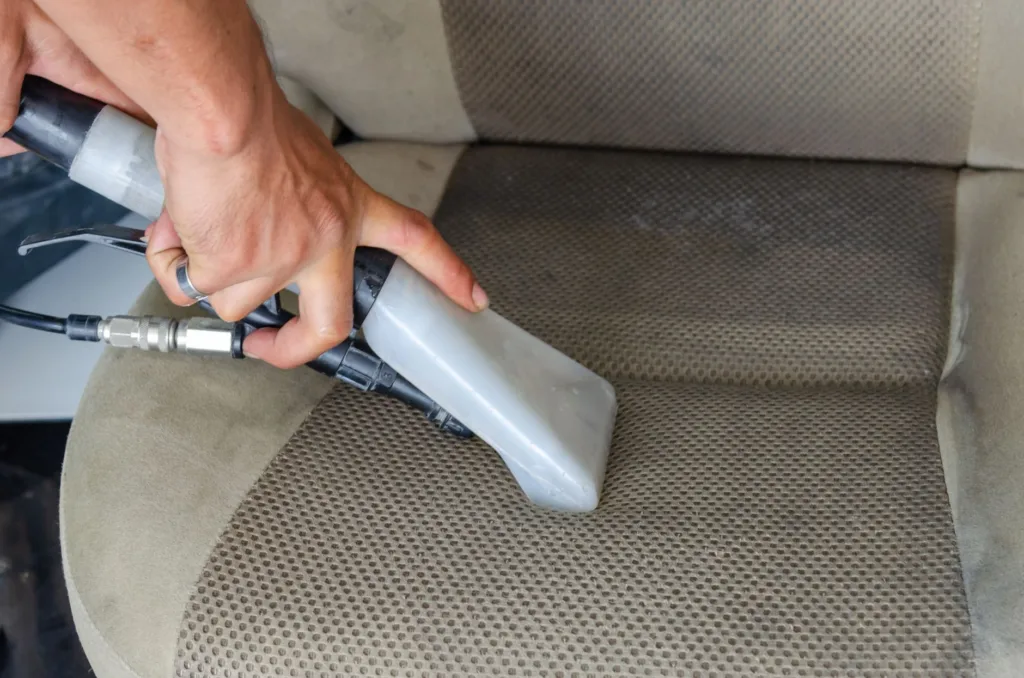
Cleaning car seats properly starts with knowing what material you are dealing with, removing loose debris first, and using the right amount of moisture for the surface. Fabric, leather, vinyl, and synthetic upholstery all clean differently, and the wrong approach can leave stains, water marks, stiffness, or even permanent damage. The basic process is simple, but doing it well takes a little preparation and care.
For most car seats, the safest approach is to vacuum thoroughly, test any cleaner in a hidden spot, work in small sections, and avoid saturating the material. Fabric seats often need a fabric cleaner and gentle agitation. Leather seats usually need a pH-balanced leather cleaner and a soft microfiber towel. Vinyl and synthetic materials are generally easier to clean, but they still benefit from mild cleaners and careful wiping.
If you want the seats to look clean and last longer, the goal is not just to remove visible dirt. You also want to lift body oils, sweat, food residue, sunscreen, pet hair, and grime that can break down the material over time. Done correctly, seat cleaning improves appearance, reduces odors, and helps keep the interior more comfortable and hygienic.
Start by Identifying the Seat Material
The first step in learning how to clean car seats properly is identifying the seat material. Many cleaning problems happen because people use the same method on every surface. That can work on some seat covers, but not on the original upholstery in most vehicles.
Check the owner’s manual if you are unsure. If that is not available, look closely at the texture and seams. Real leather, synthetic leather, fabric, alcantara, suede-like inserts, and vinyl all react differently to moisture and chemicals.
Common Car Seat Materials and Their Cleaning Needs
| Material | Typical Cleaning Approach | Main Risk |
|---|---|---|
| Cloth/Fabric | Vacuum, pre-treat stains, use fabric cleaner or mild upholstery cleaner, blot and extract moisture | Over-wetting, residue buildup, slow drying |
| Leather | Vacuum, wipe with damp microfiber, use leather-safe cleaner, condition if needed | Drying out, discoloration, cracking from harsh chemicals |
| Vinyl | Vacuum, wipe with mild cleaner and microfiber, dry thoroughly | Surface haze from strong chemicals or abrasion |
| Synthetic leather or leatherette | Use mild cleaner, soft towel, light agitation if needed | Staining at seams, dull finish from aggressive scrubbing |
| Suede or alcantara-style material | Use very gentle cleaning, low moisture, specialized upholstery-safe care | Matting, water spotting, texture damage |
When in doubt, use the least aggressive method that can still remove the dirt. A careful first pass is better than trying to correct a damaged seat later.
What You Need Before You Start
You do not need a long list of tools to clean car seats properly. In most cases, a few basic items are enough. Having everything ready before you begin makes the job cleaner and faster.
- A vacuum with a crevice tool
- Several clean microfiber towels
- A soft interior brush or detailing brush
- A bucket of clean water
- A mild upholstery or interior cleaner suitable for the seat material
- A soft sponge or applicator pad, if needed
- Optional: a wet-dry vacuum or extractor for fabric seats
It also helps to open the doors or work in a shaded, well-ventilated area. Direct sunlight can make cleaners dry too quickly, which may leave streaks or spots, especially on fabric and leather.
How to Clean Fabric Car Seats Properly
Fabric car seats usually need the most attention because they trap dust, crumbs, sweat, and spills in the fibers. They can also hold onto odors more easily than smooth materials. The key is to clean the surface without soaking the padding underneath.
Step 1: Vacuum Thoroughly
Vacuum the entire seat first, including seams, corners, and the space between the seat cushion and backrest. Use a crevice tool to reach tight spots. Removing dry debris first prevents it from turning into muddy residue when you apply cleaner.
If there is pet hair, use a rubber brush, upholstery brush, or your vacuum’s upholstery attachment to lift it before moving on. Hair left behind can get embedded deeper when the seat is scrubbed.
Step 2: Pre-Treat Stains
Spot-treat visible stains before cleaning the entire seat. Apply a small amount of upholstery cleaner to the stained area, not directly to the whole seat. Let it sit for a short time if the product directions allow, then blot gently with a microfiber towel.
Different stains may need different handling. Food and drink stains often lift with mild agitation, while greasy stains may need a little more dwell time and repeated blotting. The goal is to pull the stain out of the fabric, not rub it deeper into the fibers.
Step 3: Clean in Small Sections
Work on one section at a time. Lightly apply cleaner, then use a soft brush to loosen dirt with small circular or back-and-forth motions. Do not scrub hard. Heavy pressure can distort the fibers and create worn-looking spots.
After agitation, blot with a clean microfiber towel. If the towel picks up a lot of soil, switch to a fresh one so you are not putting dirt back into the seat.
Step 4: Remove Moisture
Fabric seats should never be left damp for long periods. Excess moisture can soak into the foam padding and lead to odor or mildew. Use a dry microfiber towel to blot as much liquid as possible. If you have a wet-dry vacuum or extractor, it can help pull out more moisture from the fabric.
Leave the doors open or use fans to speed drying. Avoid using heat too aggressively, since that can set some stains or make the fabric dry unevenly.
Step 5: Repeat Only if Needed
Older or heavy stains may need a second pass. If the stain is still visible, repeat the cleaning process rather than using a stronger product right away. Going too harsh too soon can discolor the seat or leave a cleaner residue that attracts dirt later.
How to Clean Leather Car Seats Properly
Leather seats need a gentler approach than fabric. The surface may look tough, but harsh cleaners, strong degreasers, or too much water can dry out the leather and affect the finish. Proper leather care is about cleaning dirt while protecting flexibility and color.
Step 1: Vacuum and Remove Loose Dirt
Vacuum leather seats first, especially around seams and perforations. Dust and grit can scratch the surface during cleaning if they are not removed first. Use a soft brush attachment if your vacuum has one.
Step 2: Wipe the Surface Lightly
Use a clean microfiber towel lightly dampened with water or a leather-safe cleaner. Wipe one section at a time. Avoid saturating the seat, since liquid can collect in stitching and seams.
Step 3: Use a Leather-Safe Cleaner
Apply a small amount of cleaner to a microfiber towel or applicator, then clean the leather in gentle motions. Focus on high-contact areas such as the seat cushion, side bolsters, and headrest. These areas often collect body oils, sunscreen, and grime faster than the rest of the seat.
If the seat has perforations, be careful not to flood them with liquid. Excess cleaner can seep through and leave residue behind.
Step 4: Wipe Away Residue
After cleaning, use a separate slightly damp towel to remove any remaining product, then dry with another clean towel. Leaving residue on leather can make the surface feel sticky or dull.
Step 5: Condition When Appropriate
Some leather seats benefit from conditioning after cleaning, especially if they are older or feel dry. Conditioning can help maintain softness and reduce the risk of cracking over time. That said, not every modern coated leather seat needs frequent conditioning. Too much conditioner can leave a greasy feel or attract dust.
Always follow the vehicle manufacturer’s care guidance when available. Some leather surfaces are coated and need less conditioning than people expect.
How to Clean Vinyl and Synthetic Seats
Vinyl and synthetic leather are usually easier to care for than natural leather or fabric. They resist spills better and often clean up with mild soap and water or a gentle interior cleaner. Even so, they still require care to avoid dulling the finish.
Start with vacuuming, then wipe the surface with a microfiber towel and mild cleaner. Use a soft brush only if grime is stuck in textured grain or seams. After cleaning, dry the seat fully so it does not feel slippery or leave streaks.
These materials are common in work vehicles, older vehicles, and some modern trims. They are durable, but harsh chemicals can make them look cloudy or chalky over time.
How to Handle Common Stains on Car Seats
Not all stains behave the same way. A coffee spill is different from mud, sunscreen, grease, or ink. Knowing what you are dealing with helps you choose a reasonable method instead of overworking the seat.
Food and Drink Stains
Blot spills immediately if possible. For dried spills, vacuum loose debris first, then use a suitable upholstery or leather cleaner. A gentle approach usually works best. Repeated blotting often removes more stain than aggressive scrubbing.
Grease and Oil-Based Stains
Greasy stains often require a little more dwell time from the cleaner. Use a product designed for upholstery or interior use, then blot carefully. For fabric, a second cleaning pass may be needed. For leather, avoid harsh degreasers that can strip the finish.
Ink Stains
Ink is difficult and can spread if treated too aggressively. Use a minimal amount of an appropriate cleaner and test first. On leather, some ink marks may need professional attention if they are old or deep.
Mud and Dirt
Let mud dry before removing it. Dry mud is easier to vacuum or brush away than wet mud, which can smear into the fibers. Once loose dirt is removed, clean the remaining stain as usual.
Water Stains
Water stains can leave rings on fabric if the seat dries unevenly. To reduce this, clean the surrounding area evenly rather than trying to treat just the ring. Proper drying is important, because partial moisture can make marks more noticeable.
Cleaning Method Comparison for Different Seat Types
| Seat Type | What Works Well | What to Avoid | Difficulty |
|---|---|---|---|
| Fabric | Vacuuming, spot treatment, light agitation, extraction | Over-saturating, harsh scrubbing, leaving moisture in the padding | Moderate |
| Leather | Soft microfiber, leather-safe cleaner, gentle wiping | Bleach, strong solvents, rough brushes, soaking seams | Moderate |
| Vinyl | Mild cleaner, microfiber towel, dry buffing | Abrasive pads, heavy solvents, leaving residue | Easy |
| Synthetic leather | Light cleaning, soft towel, careful seam cleaning | Strong degreasers, excessive water, hard scrubbing | Easy to moderate |
| Suede or alcantara | Gentle dry brushing and low-moisture cleaning | Heavy moisture, stiff brushes, harsh chemicals | More delicate |
Common Mistakes When Cleaning Car Seats
Many seat cleaning problems come from rushing the job. Avoiding a few common mistakes can save time and prevent damage.
Using Too Much Cleaner
More cleaner does not usually mean better cleaning. Excess product can leave residue that attracts dirt or makes fabric feel stiff. On leather, too much liquid can seep into seams and stitching.
Scrubbing Too Hard
Heavy scrubbing can wear down fabric fibers, shine leather unevenly, or damage delicate inserts. Use controlled, light pressure instead.
Skipping the Vacuum Step
If you clean over grit and crumbs, you can grind dirt deeper into the seat. Always remove loose debris first.
Not Testing the Cleaner First
Always test a cleaner in a hidden area, especially on older seats or dyed materials. Some surfaces can react with discoloration or texture changes.
Leaving Seats Damp
Moisture left in the seat cushion can lead to odor, mold, or mildew. Proper drying is part of the cleaning process, not an afterthought.
Using Household Cleaners Without Checking the Label
Some household cleaners are too strong for automotive interiors. They may contain chemicals that dry out leather, fade fabric, or leave slippery residue. A cleaner should be appropriate for the specific seat material and safe for automotive use.
How Often Should You Clean Car Seats?
How often you clean car seats depends on use. A daily driver with kids, pets, sports gear, or frequent food spills will need attention more often than a weekend car. There is no single schedule that fits every vehicle.
A practical routine is to vacuum seats regularly and do a deeper cleaning when they start to look dull, feel sticky, or show visible staining. Leather often benefits from routine wiping and occasional conditioning, while fabric may need periodic spot cleaning and deeper extraction as needed.
If you live in a dusty area, commute with the windows open, or carry passengers often, the interior may need more frequent care. In contrast, lightly used vehicles may only need a thorough seat cleaning a few times a year.
How to Dry Car Seats After Cleaning
Drying is one of the most overlooked parts of the process. Even a well-cleaned seat can develop odors if it stays damp too long.
Open doors or windows if weather allows. Use a fan to move air across the seats. In humid weather, parking in a ventilated garage or shaded area is helpful. Avoid sitting on or using the seats until they are fully dry.
For fabric seats, lift the cushions slightly if possible to improve airflow around seams and edges. For leather, dry the surface with a microfiber towel after cleaning and let it air dry naturally. Do not use intense heat on leather, since it can dry out the surface unevenly.
Special Situations: Kids, Pets, and Heavy Daily Use
Family vehicles often collect more mess than expected. Juice spills, snack crumbs, sunscreen, shoe marks, and pet hair can all build up quickly. In these situations, a regular maintenance routine is more effective than waiting for the seats to look badly soiled.
For kids’ messes, clean spills as soon as possible and pay special attention to seat seams and booster-seat contact points. For pet use, remove hair before wet cleaning, since moisture can make it harder to lift out. For rideshare or high-use vehicles, more frequent vacuuming and spot cleaning can help prevent dirt from becoming embedded.
If the seat contains heated elements, power-adjustment controls, or airbag components, be careful not to flood switches, buttons, or seams with liquid. Use only the amount of cleaner needed and keep moisture away from electrical parts.
When Professional Cleaning May Be Worth It
Most seat cleaning can be done at home, but some situations are better handled by a professional detailer or upholstery specialist. Deep stains that have set into the foam, severe odor issues, mildew, ink on leather, and delicate materials can be difficult to fix without the right tools and experience.
Professional cleaning may also be worthwhile if the seats are expensive, heavily contaminated, or made of a delicate material such as alcantara. In many cases, a professional can use extraction or specialized methods that are not practical for a home garage setup.
That said, regular maintenance at home still matters. Even if you occasionally pay for a deep clean, routine vacuuming and light stain removal can reduce the need for more expensive work later.
Simple Maintenance Habits That Keep Seats Cleaner Longer
Cleaning car seats properly is easier when you prevent buildup in the first place. Small habits make a noticeable difference over time.
- Vacuum crumbs and grit regularly
- Wipe up spills as soon as they happen
- Use seat covers carefully if they fit well and do not trap moisture
- Avoid eating messy foods in the car when possible
- Brush off sand, dirt, and pet hair before they get ground into the upholstery
- Keep a microfiber towel in the vehicle for quick cleanups
These habits do not replace proper cleaning, but they reduce how often you need to do a deeper one.
FAQs
Can I use soap and water to clean car seats?
Sometimes, yes. Mild soap and water can work on some vinyl and synthetic materials, and in some cases on fabric if used sparingly. The key is to avoid soaking the seat and to make sure the soap is not too strong for the material.
What is the safest cleaner for car seats?
The safest cleaner is one that matches the seat material and is intended for automotive interiors. A mild, material-appropriate cleaner is usually safer than a strong household cleaner.
How do I clean car seats without leaving water marks?
Use minimal moisture, clean evenly, and blot dry with a clean microfiber towel. Uneven wetting is a common reason water marks appear, especially on fabric.
Can I use a steam cleaner on car seats?
Steam can be useful in some situations, but it is not ideal for every seat material. Too much heat or moisture can damage delicate upholstery, leather finishes, or adhesives. Check the material first and use caution.
Do leather seats need conditioner every time I clean them?
Not always. Many modern leather seats do not need frequent conditioning, especially if they are coated. Conditioning too often can leave a greasy residue. Use it only when needed and according to the seat type.
Why do my seats still smell after cleaning?
Odors can remain if moisture is trapped in the cushion, if the spill reached deeper layers, or if residue is still present. Thorough drying and proper extraction are often necessary for lingering smells.
How do I clean car seat seams and crevices?
Use a vacuum crevice tool first, then a soft detailing brush or microfiber towel wrapped around a fingertip or small tool. Be gentle so you do not damage stitching or push dirt deeper.
Conclusion
Cleaning car seats properly means using the right method for the material, starting with a thorough vacuum, treating stains carefully, and avoiding excess moisture. Fabric seats usually need more cleaning and drying attention. Leather seats need gentle products and light wiping. Vinyl and synthetic materials are easier to maintain, but they still benefit from careful cleaning.
The most common mistakes are over-wetting, scrubbing too hard, using the wrong cleaner, and skipping proper drying. If you clean in small sections, test products first, and stay patient with stubborn stains, you can keep car seats looking better for longer without causing damage.
Regular maintenance matters just as much as deep cleaning. A little routine care helps prevent odor, wear, and buildup, which makes every future cleaning job easier.