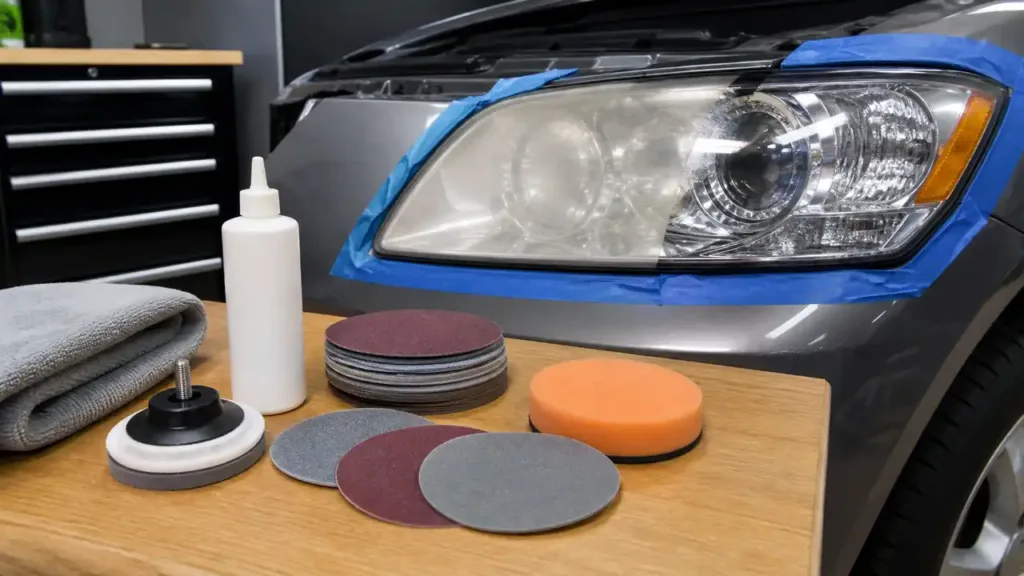
That dull, yellowed glare on aging headlights is one of those small things that makes a car look tired and drives down nighttime visibility. Buyers shopping for the best headlight restoration kit want two outcomes: a clear lens that improves beam output, and a protective finish that holds up to sun and road grime. Some people focus on quick fixes that look great for a month, while others want a longer-lasting ceramic-style sealant that saves time and money over multiple seasons.
Common mistakes are easy to make. Skipping proper masking and sanding leaves streaks and paint damage. Choosing a product that only polishes surface haze can give a dramatic before-and-after that fades fast. What matters most when choosing a kit is matching the system to your headlights and patience level. If you have heavy oxidation and pitting, an abrasive kit with sanding discs and a clear coat is usually the right play. If the haze is light and you want a fast weekend fix, a spray-and-wipe ceramic option will do the job. Different buyers prioritize speed, durability, cost, or brand confidence, and that affects which kit is best.
For this roundup I lean toward CERAKOTE for overall balance of durability and ease of use, but the list below includes budget picks, drill-activated pro kits, and gentle spray-on systems so you can match the choice to how much elbow grease you want to spend.
If you are short on time, the comparison table below gives a fast overview of the top options. Click any product name to jump to its detailed review further down.
Best Headlight Restoration Kit Comparison Table
| Product | Best For | Main Strength | Tools Required |
|---|---|---|---|
| CERAKOTE Ceramic Headlight Restoration Kit | Long-Lasting Protection | Ceramic coating that bonds to lens | No power tools |
| 3M Ultra Headlight Restoration Kit (39195) | Heavy Oxidation | Multi-grit sanding + clear coat | Optional drill |
| SYLVANIA Headlight Restoration Kit | Beginner-Friendly | Clarifying compound + UV coating | No tools |
| Spray & Wipe Headlight Restoration Kit | Quick Touch-Ups | No-sand ceramic spray | No tools |
| Meguiar’s Ultimate Headlight Restoration Kit | Long-Term Sealant | Two-grade sanding + 18+ month seal | No power tools |
| CUTEBEY Advanced Car Headlight Restoration Kit | Hydrophobic Finish | Spray-on ceramic + water repellency | No tools |
| 3M Auto Restore and Protect (39194) | Budget Sanding Kit | Simple sanding discs + clear coat wipes | Optional drill |
| 3M Headlight Lens Restoration System (39008) | Pro-Level Results | Drill-activated sanding for heavy haze | Household drill required |
| Chemical Guys Headlight Restoration & Ceramic Kit | Detailer Favorite | Restoration compound + HydroCharge protection | No tools required |
If you want a closer look at how each kit performs and who it fits best, read the detailed reviews below for hands-on impressions and real-world tradeoffs.
1. Best Overall: CERAKOTE Ceramic Headlight Restoration Kit

One reason this option stands out is its promise of a ceramic coating that bonds to the lens and claims to last as long as you own the vehicle. The kit pairs oxidation-removing wipes, a sanding step for deeper haze, and ceramic coating wipes for protection. That sequence addresses both surface haze and provides a true protective layer, so the initial shine has a higher chance of staying clear through sun exposure and regular washes.
Picture a Saturday morning cleanup where the headlights look clouded from a year of winter salt. You can remove the worst oxidation with the sanding step, then apply the coating and watch the lens go from foggy to glass-like. Another real moment: after a heavy rain, the hydrophobic quality of ceramic shows its worth when water beads off instead of clinging to the lens and trapping dirt.
Pros
- Ceramic coating that chemically bonds to the plastic lens
- Three-step system tackles oxidation and protection
- No power tools required, friendly for DIYers
- Compact kit is easy to store and use on multiple vehicles
- Clear instructions and quick 30-minute workflow
Cons
- Sanding step can be fiddly for beginners
- Results depend on how well the coating is applied and cured
The CERAKOTE kit is best for owners who want a longer-lasting seal after restoration without having to seek a professional ceramic application. It suits someone willing to spend a little time on prep so the coating bonds properly. Drivers with severe pitting or cracked lenses may still need more aggressive sanding or replacement, but for most oxidized lenses this approach is a strong balance of durability and convenience. If you prefer a single spray-and-wipe step instead of sanding, look at the spray kits below, but expect shorter-lived protection.
To buy this product, click here.
2. Best For Heavy Oxidation: 3M Ultra Headlight Restoration Kit (39195)

For buyers who prioritize removing heavy yellowing, this 3M kit is a go-to because it brings a graduated sanding approach and a clear coat to finish. The inclusion of 500, 800, and 3000 grit discs plus a disc pad holder lets you work through rough oxidation down to a smooth finish that accepts the clear coat. That staged sanding is what gives pro-level clarity when performed carefully.
Imagine tackling a pair of headlights that have sat in full sun for years. The first pass with the coarse disc removes the bulk of the oxidation and the finer discs refine the surface. Another scenario: a DIYer using a common household drill to speed the job finds the disc holder and sanding sequence make the process predictable compared to ad-hoc methods, and the clear coat at the end keeps the lenses from re-yellowing quickly.
Pros
- Effective against heavy oxidation and thick yellowing
- Includes a full range of sanding grits for a stepped repair
- Clear coat finish improves durability after sanding
- Can be used by hand or with a drill for faster results
- Good documentation and brand reputation
Cons
- Drill use requires steady hands to avoid hotspots
- More prep and time compared with spray-on kits
This kit is aimed at people comfortable with a bit more elbow grease and who want results closer to a shop job. It performs best on heavily oxidized lenses where polishing alone fails. If you own a drill and want predictable, long-lasting clarity, this is a cost-effective choice. If you prefer to avoid sanding or risk of paint scuffs, choose a no-sand spray kit instead.
To buy this product, click here.
3. Best For Beginners: SYLVANIA Headlight Restoration Kit

If your goal is an easy, low-risk restoration that improves night visibility without intimidating steps, Sylvania hits a sweet spot. The kit bundles a surface activator, sandpaper, a clarifying compound, and a UV-blocking clear coat. The workflow is straightforward and the company’s experience with automotive lighting shows in the formula choices, which focus on improving light output safely.
Think of a parent doing an evening safety check before a road trip and spotting cloudy lenses. With this kit they can clean and apply the coating in under an hour and head out with noticeably better beam spread. Or picture a first-time DIYer who wants clear results without renting tools. The no-drill approach reduces risk of accidental lens damage.
Pros
- User-friendly kit designed for homeowners
- Includes an exclusive UV-blocking clear coat
- Improves night visibility as well as appearance
- No power tools required
- Clear steps for two-lens treatment
Cons
- May not be aggressive enough for severe oxidation
- Protection may be shorter than premium ceramic seals
Buyers who want a sensible middle ground should consider Sylvania. It works well where oxidation is moderate and the priority is safety rather than show-car perfection. Avoid this kit if lenses are deeply pitted or heavily yellowed, because the lighter sanding pads and compound will struggle to remove very thick oxidation. For that, one of the 3M sanding systems is a better match.
To buy this product, click here.
4. Best Quick Fix: Car Headlight Restoration Kit (Spray & Wipe)

If time is tight and you want an immediate cosmetic and visibility boost, spray-and-wipe kits are hard to beat. This option advertises no sanding and a true ceramic-style coating that bonds chemically. The main attraction is speed. For lightly clouded lenses a single spray, wipe, and cure cycle gives a visible improvement with minimal prep.
Picture arriving late to a meet-up and wanting your car to look fresh for photos. A quick spray-and-wipe will dramatically change the appearance of the lenses in minutes. Another scenario: a commuter who notices headlight dulling in winter and prefers to do a quick renew every few months rather than a one-day sanding session.
Pros
- Extremely fast and user-friendly spray-and-wipe workflow
- No sanding or power tools required
- Multiple uses per kit, suitable for 2 to 3 treatments
- Good option for light haze and ongoing maintenance
Cons
- Shorter protection window compared with full sanding + clear coat systems
- Not ideal for heavy oxidation or pitted lenses
Choose a spray-and-wipe kit if you value speed and simplicity and your lenses are only lightly hazed. It is also a great maintenance product after a deeper restore. If you need a durable, long-lasting finish for heavily oxidized lenses, combine a sanding kit with a ceramic coating for the best longevity.
To buy this product, click here.
5. Best For Long-Term Protection: Meguiar’s Ultimate Headlight Restoration Kit

If your priority is a restoration that lasts through seasons, Meguiar’s Ultimate kit deserves attention. The workflow uses two sanding grits and pre-saturated wipes that deliver a sealant rated for 18 plus months of protection. That makes it a great candidate for people who want to restore once and maintain minimal upkeep thereafter.
Think of someone prepping a vehicle for sale and wanting headlight clarity that holds until the sale closes. This kit’s longer-rated protection reduces the chance of re-oxidation during the selling window. Or imagine a busy driver who prefers one focused afternoon of work that will keep headlights clear through the next year and beyond.
Pros
- Durable sealant with 18+ months of protection
- Two-grade sanding for visible clarity improvement
- Ease of use with pre-saturated wipes for final coating
- Backed by a well-known detailing brand
Cons
- Requires sanding step for best results
- Kit size may be small for multiple full restorations
This is a top pick for owners who want a reliable, longer-term finish without paying for professional services. If you have light haze the kit will be quick to use, and for heavier oxidation the sanding stage will give a restored surface that accepts the long-life seal. Owners who dislike sanding or who want instant fixes should look at spray kits instead.
To buy this product, click here.
6. Best For Hydrophobic Finish: CUTEBEY Advanced Car Headlight Restoration Kit

If you want a restoration that also sheds water and road grime, CUTEBEY’s spray-on system focuses on UV and hydrophobic protection. The kit positions itself as a gentle, no-sand solution that leaves a ceramic-like protective shield. That hydrophobic layer can help keep lenses clearer longer between treatments.
Imagine driving through a spring rain and noticing droplets bead and roll off the lens instead of staying as a film that diffracts light. That same bead effect reduces the accumulation of grime in everyday driving. Another relatable moment is a weekend detail where a single spray application gives the car a brighter presence without a lengthy sanding process.
Pros
- Leaves a water-repelling finish that improves wet-weather clarity
- Quick spray-and-wipe method with no sanding
- Safe for a range of plastic and polycarbonate lenses
- Good kit coverage for multiple vehicles
Cons
- Less effective on heavily oxidized or scratched lenses
- Protection duration can be shorter than abrasive + clear coat methods
This kit is ideal for drivers who want a low-effort update with useful functional benefits in rain and for everyday protection. It is particularly attractive for motorcycles and seasonal vehicles that face water exposure. If your lenses have deep yellowing, plan to pair a sanding-based restore first, then use CUTEBEY for maintenance.
To buy this product, click here.
7. Best Budget Sanding Kit: 3M Auto Restore and Protect (39194)

If you want a simple sanding approach without an expensive price tag, the 3M Auto Restore and Protect kit strips away light to moderate yellowing and finishes with clear coat wipes. It is pared down compared with the Ultra kit, but it gets the essential sanding and protective steps right for many everyday cases.
Think of a car that lives outdoors and develops light haze over a few seasons. The 3M sanding discs and quick clear coat wipe let an owner restore usability and appearance over an afternoon. Another scenario: a budget-conscious DIYer who wants to save hundreds compared with lens replacement and is comfortable doing a little sanding by hand.
Pros
- Very affordable for a sanding-based kit
- Includes refinement discs and protective clear coat wipes
- Works well for light to moderate oxidation
- Compact and easy to store
Cons
- Less complete than higher-end 3M kits for extreme haze
- Manual sanding can be tiring and inconsistent
For buyers balancing cost and effectiveness, this kit is a practical pick. It is best for hands-on users prepared to sand and polish by feel. If you want pro-level clarity for extreme yellowing, consider the more comprehensive 3M Ultra or the drill-activated 39008 kit.
To buy this product, click here.
8. Best For Pro-Level Results: 3M Headlight Lens Restoration System (39008)

This 3M system is built for someone who wants shop-quality restoration at home. It relies on drill-activated sanding with a full set of abrasive discs and a rubbing compound to remove the harshest yellowing. When used carefully it can restore a lens to a level very close to OEM clarity, especially on lenses that suffered years of UV exposure.
Imagine a classic car owner bringing a vehicle back to showroom condition. The 39008 kit gives the control needed to remove stubborn haze and produce a surface that reflects light cleanly. Or consider a driver who uses a drill to speed through the job and appreciates the consistent removal rates that a powered setup provides compared with hand sanding.
Pros
- Drill-activated sanding for maximum clarity
- Includes rubbing compound for finishing polish
- Designed for the harshest yellowing and long-term restoration
- Good for multiple lenses and heavy-duty jobs
Cons
- Requires a household drill and steady pressure
- Higher risk of sanding through the clear layer if used incorrectly
This kit is for confident DIYers and detailers who want the cleanest results and are comfortable using a drill. It rewards patience and technique with excellent clarity, but beginners should follow instructions closely and mask surrounding paint carefully. For casual users, a non-drill kit may be safer.
To buy this product, click here.
9. Best For Detailers: Chemical Guys Headlight Restoration & Ceramic Kit

This kit appeals to people who already have detailing gear and want a pro-level product without a huge learning curve. Chemical Guys combines a restoration compound with HydroCharge protection, which is a ceramic-type finish that provides water beading and UV protection. The formula-focused approach makes it easy to use by hand or with a machine if you want to speed the job.
Imagine a weekend detail where you rotate between polishing the paint and restoring the headlights, using one brand across tasks for consistency. Another example: a commuter who appreciates the HydroCharge finish after a winter where salt and splash reduced visibility. The protective layer helps delay the next tune-up.
Pros
- Quality restoration compound with protective HydroCharge finish
- Usable by hand or machine for flexibility
- Designed for both aesthetics and improved light output
- Trusted detailing brand with good support and instructions
Cons
- More expensive than very basic kits
- Not as hands-off as single-step sprays for casual touch-ups
Detailers and enthusiasts who want a branded, performance-oriented finish will appreciate Chemical Guys. It is a solid choice for those who already understand compounding and polishing techniques, or those willing to learn for a better long-term result. If you want the lowest initial cost and simplest method, a spray kit is easier, but you trade off some longevity.
To buy this product, click here.
Best Headlight Restoration Kit FAQ
How do I know if my headlights need restoration or replacement?
Check for deep cracks, severe pitting, or pieces missing from the lens. Surface yellowing and cloudiness are usually restorable with sanding and coating. If the plastic is physically cracked, replacement is safer. Also assess light output at night before and after cleaning; a big difference usually indicates restoration will help.
Do I need a drill for good results?
No. Many effective kits are designed for hand use and include sanding pads and compounds that work manually. A drill or rotary polisher speeds the job and can deliver more consistent results, but it increases the risk of removing too much material if you are inexperienced.
How long does a headlight restoration last?
It depends on the method. Sanding plus a quality clear coat or ceramic seal can last 12 to 24 months or more. Spray-and-wipe kits and basic polish-only methods typically last a few months to a year depending on exposure. Weather, sun exposure, and driving conditions determine longevity.
Can I restore headlights myself without removing the lens?
Yes. The majority of kits are designed for in-place restoration. Masking tape around the headlight edges protects paint during sanding. Removing the headlight can make access easier on some vehicles, but it is not required for most jobs.
Will restoration improve nighttime visibility?
Yes. Cloudy lenses scatter and block light, reducing beam reach and pattern. Restoring clarity returns more light to the road, which improves contrast and visibility. However, restoration cannot change alignment or lamp output, so check headlight aim after restoring.
Is a ceramic coating worth it?
Ceramic coatings provide harder surfaces, better UV resistance, and water repellency compared with simple wax or polymer wipes. They extend the time between restorations, making them worthwhile if you want longer intervals between maintenance and better protection from environmental hazards.
How should I prepare a headlight before applying a protective coat?
Clean thoroughly to remove dirt and road film, sand away oxidation to an even surface when required, remove sanding dust with a tack cloth or cleaner, and ensure the lens is fully dry. Follow the kit instructions on surface activator or primer steps before applying the coating.
Can these kits be used on taillights and other lenses?
Yes. Most kits are safe for plastic lenses including taillights and fog lights, but always check the manufacturer’s instructions. Avoid use on painted or chrome surfaces unless specifically indicated.
Final Verdict
For most drivers who want the best balance of durability, ease, and long-term protection the CERAKOTE Ceramic Headlight Restoration Kit is the top overall pick. It combines oxidation removal with a ceramic sealant and requires no power tools, which suits homeowners looking for an investment they do once and enjoy for the long haul. If you face heavy yellowing and want shop-grade clarity, the 3M Ultra or the drill-activated 3M 39008 system are the stronger choices. For quick touch-ups and lower effort, spray-and-wipe options like CUTEBEY or the no-sand spray kit offer immediate cosmetic and functional gains.
Match your choice to your priorities. Choose a sanding-plus-clear-coat method if your headlights are badly degraded and you want durability. Choose spray-and-wipe if you prefer convenience and maintenance between deeper restores. Finally, take care with masking and technique to avoid paint scuffs and to maximize how long the restoration lasts.