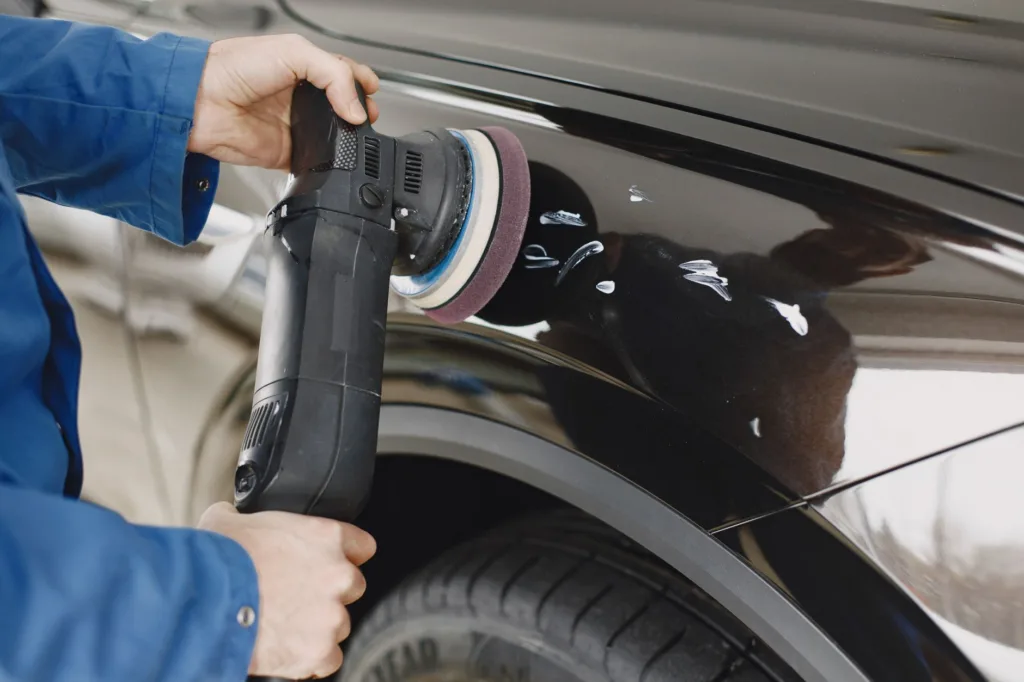
Yes, paint correction can damage paint if it is done poorly, too aggressively, or too often. But when performed correctly, paint correction is generally a controlled process that removes a very thin layer of clear coat to improve the surface appearance, not a process that harms healthy paint.
The key point is that paint correction is not “paint repair” in the body-shop sense. It is a refinement process. That means it has limits. If a vehicle already has thin clear coat, prior repaint work, deep scratches, sanding marks, or improper polishing history, the risk of damage goes up. The process itself is not automatically dangerous, but the way it is used determines whether it remains safe.
What Paint Correction Actually Does
Paint correction is the process of removing or reducing surface defects in automotive paint, such as swirl marks, light scratches, oxidation, water spots, and haze. This is usually done with a machine polisher, pads, and compounds or polishes.
Most modern vehicle finishes have three main layers:
- Primer, which helps adhesion and corrosion protection
- Base coat, which provides color
- Clear coat, which adds gloss and protects the color
When detailers talk about paint correction, they are usually working on the clear coat. The goal is to level the surface enough to remove visible defects while leaving enough clear coat in place to maintain long-term protection.
This is why paint correction needs judgment. You are not simply “buffing out” flaws in a harmless way. You are removing material, even if the amount is very small.
Can Paint Correction Damage Paint?
Yes, it can. Damage usually happens when the paint is removed too aggressively, too frequently, or with the wrong technique. Common forms of damage include clear coat thinning, holograms, micro-marring, buffer trails, burn-through on edges, and uneven finish quality.
However, the more accurate answer is that paint correction can be safe when done with restraint and proper technique. The process becomes risky when someone assumes that more cutting power always equals better results.
For example, a detailer trying to remove a deep scratch on a hood may use a heavy compound and a wool pad. If they stay in one area too long, they can overheat the clear coat or cut through it. On the other hand, a careful one-step correction on a healthy factory finish may significantly improve gloss with minimal material removal.
How Paint Correction Can Cause Damage
1. Removing Too Much Clear Coat
Clear coat is finite. Every polishing step removes some of it, even if the amount is tiny. Repeated heavy correction can leave the paint too thin to protect the color coat below.
This is especially important on older vehicles or cars that have already been polished several times. If the clear coat is already thin, a seemingly minor polishing session can create long-term risk.
2. Burning Through Edges and Body Lines
Edges, sharp body lines, and corners have less paint than flat panels. Heat and pressure build up faster in these areas, so they are more likely to get damaged during aggressive polishing.
Burn-through can expose primer, base coat, or even bare metal in the worst cases. This type of damage is often permanent and usually requires repainting.
3. Creating Holograms or Buffer Trails
Incorrect pad, polish, or machine use can leave visible machine marks, sometimes called holograms, especially on dark paint. These marks are not always structural damage, but they are a form of surface defect created by the correction process itself.
They usually appear when the surface is not refined properly after an aggressive cutting step, or when rotary polishing is done without enough experience.
4. Introducing New Scratches and Marring
Paint correction should reduce defects, but dirty pads, contaminated towels, or poor washing habits can create fresh scratches during the process. If a vehicle was not properly washed and decontaminated first, polishing can drag particles across the paint and create more marring.
5. Heat Damage
Machine polishing generates heat. Excess heat can soften paint, make it more vulnerable to marring, or in severe cases damage the finish. This is more likely when working on small sections, pressing too hard, or staying on one spot for too long.
Plastic bumpers and repainted panels can also respond differently to heat than original factory panels, which makes caution even more important.
When Paint Correction Is Usually Safe
Paint correction is generally safer when these conditions are met:
- The paint is in decent condition and has enough clear coat thickness
- The technician starts with the least aggressive method possible
- The vehicle is thoroughly washed and decontaminated first
- Proper pads and polishes are matched to the paint type and defect level
- Heat is controlled and the work is done in sections
- The painter knows when to stop instead of chasing every defect
A conservative correction that removes light swirls and improves gloss is often much safer than a heavy one designed to chase every scratch. In many cases, the smartest approach is not a perfect finish, but a balanced finish that preserves paint life.
Single-Stage Paint vs Clear Coat: Why It Matters
Whether paint correction can damage paint depends partly on the type of finish. Most modern vehicles use clear coat, but older vehicles may have single-stage paint, where the color and protection are combined in one layer.
| Paint Type | Correction Risk | Notes |
|---|---|---|
| Modern clear coat | Moderate | Most common. Correction works well, but clear coat thickness must be preserved. |
| Single-stage paint | Moderate to high | Can be more sensitive, and oxidation may make the pad more abrasive as it loads up with color. |
| Repainted panels | Variable | Could be thicker or thinner than factory paint. Quality varies widely. |
| Fresh paint | High if not cured | New paint may need cure time before correction, depending on the paint system. |
Repainted panels deserve special caution because the thickness and hardness of the clear coat may not match the rest of the vehicle. Some repaints are soft and easy to haze. Others may be thick but uneven.
Common Signs Paint Correction Was Too Aggressive
If correction was too aggressive, the damage may be visible immediately or become obvious under direct light. Common warning signs include:
- Discolored or dull spots, especially on edges
- Haze or cloudy reflections
- Holograms or buffer trails
- Fresh micro-scratches after the process
- Burn-through on corners or high points
- Uneven gloss from panel to panel
Some of these issues can be refined further, but not all. If clear coat has been burned through, no amount of polishing will restore it. At that point, repainting is usually the only proper repair.
How Detailers Reduce the Risk of Damage
Start With Inspection
A responsible correction begins with inspection, not polishing. The paint should be checked under strong light to identify defect type, depth, and panel condition. If available, a paint thickness gauge can help estimate how much material is present, although it does not tell the whole story.
Thickness readings are most useful when compared panel to panel. A very thin area or a panel with inconsistent readings may need a lighter approach or no correction at all.
Use the Least Aggressive Method First
This is one of the most important practices in paint correction. Start with a mild polish and soft pad. If that removes enough defects, there is no need to step up to a heavy compound.
Many paint systems can be improved significantly with a light one-step correction. Chasing 100 percent defect removal often causes more risk than benefit.
Work in Small Sections
Polishing small areas at a time helps control heat, pressure, and product breakdown. It also makes it easier to inspect results before moving on. Large sections increase the chance of missed spots and uneven correction.
Keep Pads and Towels Clean
Contamination is a common cause of self-inflicted paint damage. A dirty pad can reintroduce grit into the finish. A dirty drying towel or wipe-off towel can also add fresh scratches.
Clean tools are not a luxury in paint correction. They are part of damage prevention.
Finish Properly After Cutting
If a compound is used, the surface often needs a finishing polish to refine haze and improve clarity. Skipping this step can leave the paint looking worse than before, even if the deeper defects were reduced.
Paint Correction vs Paint Damage: A Practical Comparison
| Situation | Likely Outcome | Risk Level |
|---|---|---|
| Light one-step correction on healthy clear coat | Improved gloss, reduced swirls | Low |
| Heavy compounding on thin clear coat | Higher chance of thinning or burn-through | High |
| Correction on dirty, unwashed paint | Possible new scratches and marring | Moderate to high |
| Repeated aggressive corrections over years | Clear coat loss over time | High |
| Careful correction by an experienced technician | Noticeable improvement with limited material removal | Low to moderate |
What Makes Some Paints More Sensitive Than Others?
Not all automotive paint behaves the same way. Some finishes are soft and mar easily. Others are hard and resist correction but can be more difficult to refine. Both extremes can create challenges.
Soft paints can haze easily and may show towel marks or polish residue if not finished carefully. Hard paints may require more aggressive products to achieve the same visual improvement, which increases the chance of overworking the surface.
Environmental exposure also matters. Paint that has spent years in strong sun may be more brittle and oxidized. This can make correction less predictable.
How Often Can You Correct Paint?
There is no universal schedule for paint correction. It should not be treated like routine maintenance such as washing or waxing. Correction is usually done only when needed, not on a fixed timetable.
If the vehicle is well cared for, it may only need a light correction occasionally, or not at all for long periods. On the other hand, a daily driver that is washed with poor technique and parked outdoors may develop swirls faster.
The important idea is that each correction removes at least some clear coat. So the more often you correct, the more important it becomes to keep each session as light as possible.
Can DIY Paint Correction Damage Paint More Easily?
Yes. DIY correction can absolutely damage paint if the person doing it does not understand pad choice, machine control, pressure, or inspection. The risk is not because DIY is automatically bad. It is because the process is easy to misjudge.
Common DIY mistakes include:
- Using too much compound
- Starting with a cutting pad when a mild pad would work
- Holding the machine in one place too long
- Failing to clean the pad during use
- Polishing dirty paint
- Assuming deeper scratches can always be removed safely
Anyone attempting correction at home should start with a less aggressive approach and test a small area first. If the paint improves enough with a mild polish, there is no reason to go heavier.
Can a Professional Still Damage Paint?
Yes. Professional does not mean risk-free. It only means the person likely has better technique, better inspection tools, and more experience judging when to stop.
Even experienced detailers can encounter surprises, such as previously repaired panels, thin clear coat, or unusually soft paint. This is why reputable detailers often explain that a “perfect” finish may not be safe or possible on every vehicle.
A trustworthy technician should be willing to say when a panel should be left alone rather than corrected further.
What to Ask Before Authorizing Paint Correction
If you are considering paint correction, the right questions can help you judge whether the process is likely to be safe for your vehicle.
- How much correction do you expect to achieve?
- Will you start with the least aggressive method?
- How do you assess paint thickness or prior repaint work?
- What defects are realistic to remove safely?
- Will you point out panels that should not be heavily corrected?
These questions are useful because they focus on process, not promises. A responsible answer should include some limits and caution, not just confidence.
Typical Mistakes That Lead to Paint Damage
Chasing Every Scratch
Not every defect should be removed. Deep scratches can go beyond the safe correction range. Trying to eliminate them completely may remove too much clear coat. In some cases, reducing their appearance is the smarter choice.
Polishing Without Proper Wash Prep
If dirt, sand, or bonded contamination remain on the panel, polishing can grind those particles into the finish. A proper wash and decontamination step helps reduce this risk.
Using the Wrong Pad or Product
Matching the wrong combination to the paint can produce haze, excessive cutting, or poor correction results. The goal is balance. More aggressive is not automatically better.
Skipping Test Spots
A test spot shows how the paint responds before the whole car is corrected. Skipping this step increases the chance of overcorrection, especially on unfamiliar paint systems.
Polishing Too Often
Every correction session removes a little material. Even if each session seems small, repeated unnecessary polishing can shorten the life of the clear coat.
When Paint Correction Should Be Avoided or Limited
There are situations where full correction may not be wise.
- The clear coat is already very thin
- The panel has been repainted and thickness is unknown
- There is known prior burn-through or sanding work
- The defect is too deep to remove safely
- The paint is fresh and has not fully cured
In these cases, the better choice may be a light enhancement only, or no correction at all. Preserving the finish is often more valuable than chasing cosmetic perfection.
How to Tell If Paint Correction Is Worth It
Paint correction is usually worth it when the vehicle has visible swirls, haze, or oxidation that make the paint look dull, and the clear coat still has enough life left to support refinement. It is less worthwhile if the paint is already close to failure or the car has extensive bodywork history.
A good rule is to consider the vehicle’s age, storage conditions, repaint history, and current condition. A garage-kept car with moderate swirls is often a good candidate. A sun-faded, thin, heavily repainted vehicle may not be.
How to Protect Paint After Correction
Once paint has been corrected, it is usually more visually sensitive to poor washing habits. The surface may look better, but it can also show new marring more quickly if maintained poorly.
Helpful habits include:
- Using gentle wash methods
- Drying with clean, soft towels
- Avoiding automatic washes with harsh brushes
- Keeping the vehicle clean so dirt does not build up
- Using protection appropriate to the finish, such as wax or sealant
These steps do not make the paint invincible, but they do help preserve the results and reduce the need for future correction.
Frequently Asked Questions
Does paint correction remove clear coat?
Yes. Paint correction removes a very small amount of clear coat to level the surface and reduce defects.
Can paint correction ruin factory paint?
It can if it is done too aggressively or too often. Properly performed correction on healthy paint is usually safe, but the risk rises when the clear coat is thin.
Is paint correction the same as buffing?
People often use the terms interchangeably, but paint correction is the broader process. Buffing usually refers to the machine polishing step used to perform the correction.
Can deep scratches be fully removed with paint correction?
Not always. If a scratch is too deep, removing it completely may require too much clear coat. In those cases, reducing its appearance may be the safest option.
How do I know if my paint is too thin to correct?
A paint thickness gauge can help, but it does not tell the full story. A professional inspection is often needed to judge whether the finish can safely be corrected.
Will paint correction damage ceramic coating?
If a vehicle has a ceramic coating, correction usually removes or weakens that coating in the corrected area. The paint itself may be safe, but the protective layer can be affected.
Can I correct paint more than once?
Yes, but each session removes some clear coat. Repeated correction should be done carefully and only when necessary.
Conclusion
Paint correction can damage paint, but it does not have to. The risk comes from excessive material removal, poor technique, overheating, contamination, and repeated aggressive polishing. When done carefully, paint correction is a controlled way to improve gloss and reduce surface defects without harming healthy paint.
The safest approach is conservative: inspect first, test a small area, use the least aggressive method that achieves the goal, and avoid chasing every deep defect. If the paint is thin, repainted, or already heavily polished in the past, correction should be limited or avoided. In short, paint correction is useful, but only when the finish has enough margin left to handle it safely.